IMPORTANT
I MADE A NEW 3D PRINTER WITH A WAY BETTER CODE
https://www.instructables.com/LEGO-3D-Printer-Using-3D-Models/
Creative Mindstorms
On my YouTube channel I upload videos about LEGO Mindstorms robots.
Visit my YouTube channel by clicking on the icon below!

The LEGO Mindstorms 3D printer
This LEGO Mindstorms 3D printer is designed with lego technic pieces and programmed in
Visual Studio Code Using LEGO® MINDSTORMS Education EV3 MicroPython.
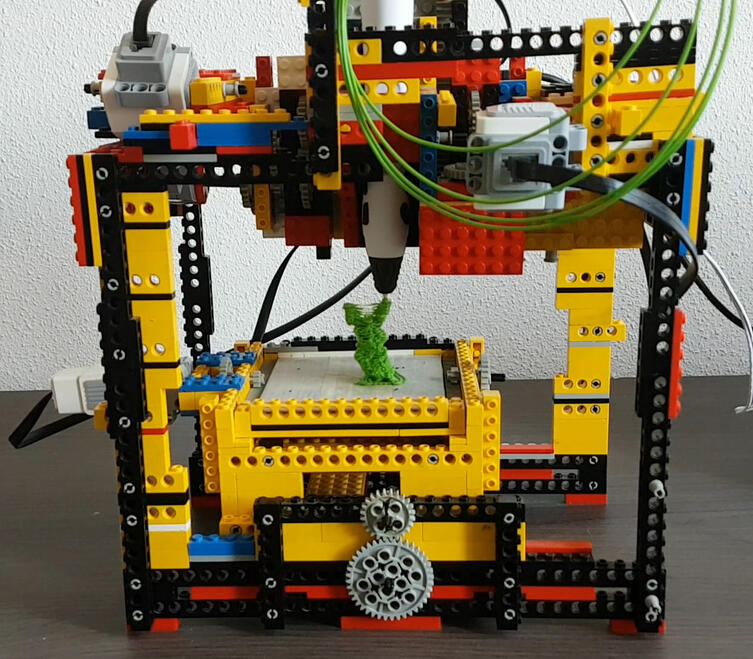
First you'll need to make a LEGO Mindstorms 3D printer.
Click the picture above to see my version.
I'm not going to link building instructions, as my 3D printer isn't the best design possible.
There are a lot of improvements to be done!
If you haven't build your LEGO Mindstorms 3D printer yet, here are some tips:
1. Make sure you build a solid structure, because the smallest amount of movement, will make a big difference in the end result.
2. Move your platform from two opposite sides per axis. Don't try moving it with just one gear on one side, because the platfom won't move in a straight line, and may get stuck. You can simply make an axle going underneath the platform and connect it to the platform with some gears. Another option is to move the platform with linear actuators attached to the middle of a side.
3. If you work with gears, make a gear transmission, that reduces the amount the platform moves, in all three directions. (I haven't done this, but i should have) I recommend only one transmission per axis, as the platform would go to slow if you made more transmissions.
4. Make sure you use two the same motors with the same transmissions to move your platform. The code is programmed to work with two the same motors, because the medium and large motor move at a different speed. When you use two different motors, the code won't work propperly and your prints will fail.
5. Build a mechanism that can push the extruderbutton on the 3d pen. It will prevent getting loose threads.

Setting up
First you need to download all the programs for the Mindstorms 3D printer:
Other equipments:
micro SD card
Getting started with LEGO® MINDSTORMS Education EV3 MicroPython.
After installing balenaEtcher and the EV3 MicroPython SD card image, you need to flash the SD card with the image.
Check the getting started guide from MINDSTORMS Education EV3 MicroPython.

After you've done this, follow the instructions about setting up Visual Studio Code with the MicroPython Extension.
Preparing and running the code.
You can change these things in the program, to make the code work with your 3D printer:
:portSelection - You can define the ports in wich the motors are put into.
:startposition - If your 3D printer starts at an offsetpoint, change the numbers to your offsetpoint.
:degreestomm Give the amount a motor has to turn, in order to move 1mm. (you may have to increase or decrease them a little bit)
:motorSpeed - The speed at wich the motors have to turn. (I recommend putting it low)
Scale: 0 - 1000(you should keep the max speed 900)
:filename - Change this to select wich gcode file the program has to read and run.
After you've changed these variables, you need to prepare your gcode files. (Go down)
Adding Gcode files.
Here is how to change your gcode files: (see video)
what to do with the gcode file:
1. replace all ; with #; (making use of ctrl. + f)
2. replace all G, X, Y, Z, E, F, M and S with G;, X;, Y;, Z;, E;, F;, M; and S; (making use of ctrl. + f)
3. Start the file with: G;0 X;0 Y;0 Z;0 E;0 F;0
4. Replace the settings on the end of the file with: G;END E;0 (Without the replace tool)
Get in touch
Do you need help with the proces of making your own 3d printer? I'm here to help! I'll try my best to answer your question.
(P.S. I'd like it if you'd send me a mail if you publish your 3d printer, so i can see how you made your 3d printer)
Contact:
© Creative Mindstorms. All rights reserved.